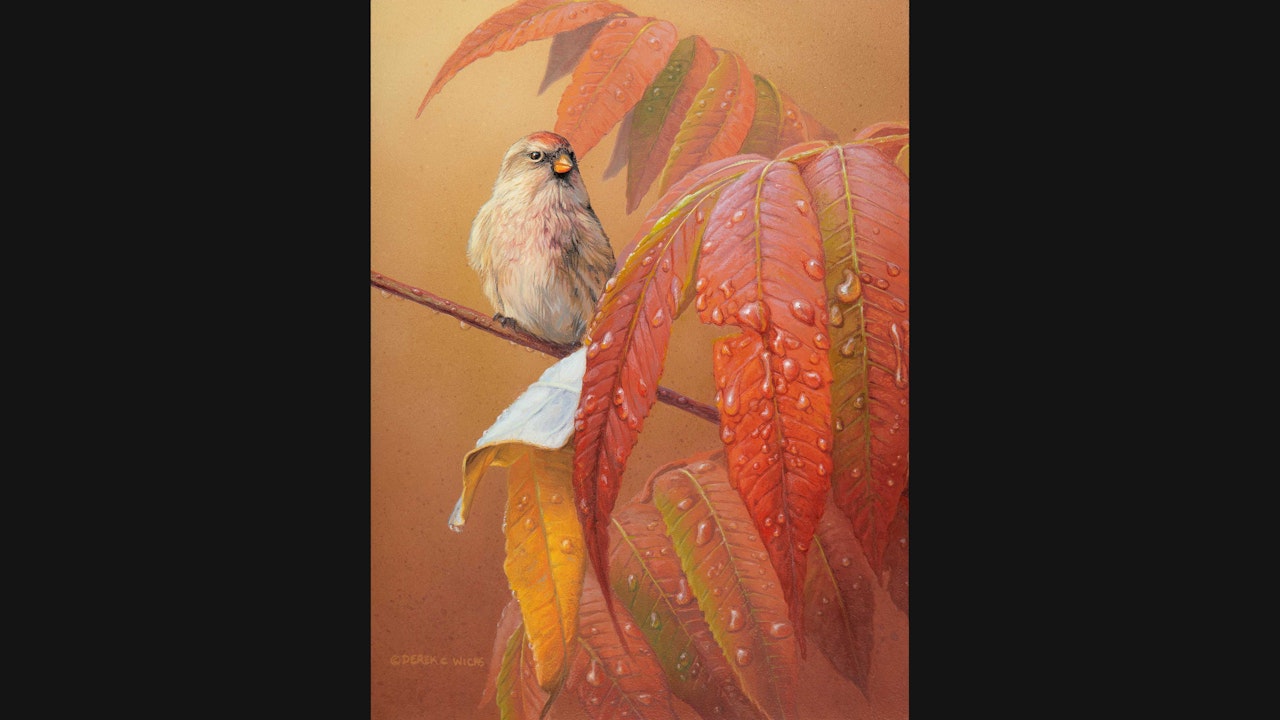
After The Rain
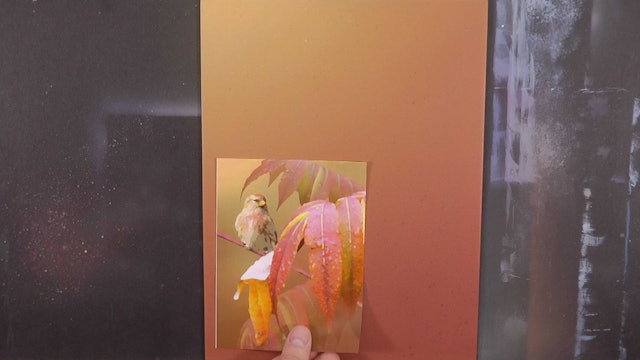
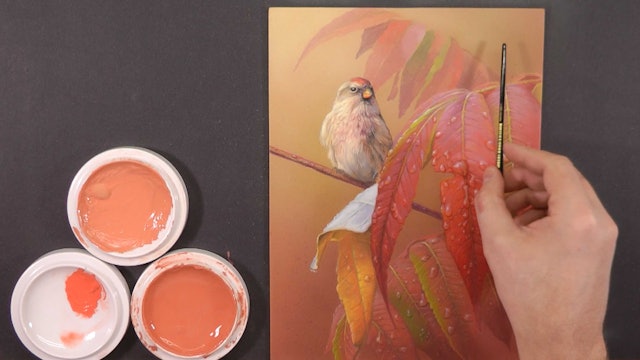
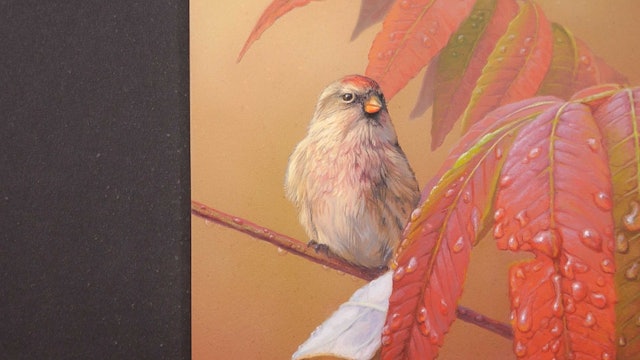
Buy This Tutorial Here - This painting was inspired by a flock of Redpolls that came through my backyard. This was very exciting as it is very rare to see these guys in my area. The reds in the males and the reds of the sumac in the backyard made a perfect combination for a painting.
Learn to use vibrant colour to create a cheerful and serene piece of work. Learn to use value and reduction of hue to create depth in your painting. Bring it all together with 'punch' elements like water drops.
Run Time: 7Hr 14 Min
Difficulty: Beginner
Board Size: 12 x 19 Inches
Lesson Aids: Line Drawing, Colour Template, Materials List, Reference Photo.
-
After The Rain Pt.1
In part one we mix our base colours and then block in our board and create a gradated background enhanced with spattering.
-
After The Rain Pt.2
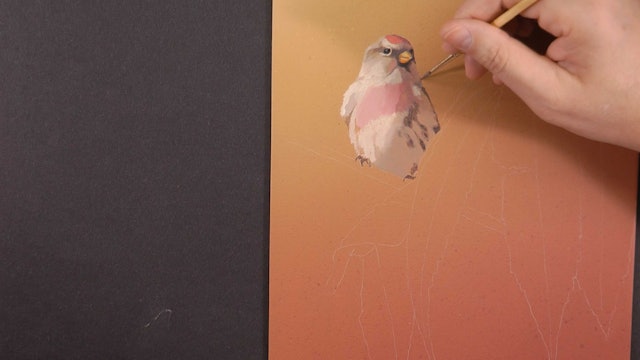
In part two we block in our redpoll using the base mixtures we created in part one.
-
After The Rain Pt.3
In part three of the tutorial we block in the sumac using our base colours.
-
After The Rain Pt.4
In part four we learn to reduce our hues and block in the background sumac leaves, then finish up with some spatter techniques.
-
After The Rain Pt.5
With blocking in complete we start to build shape and form then add detail to the redpolls head.
-
After The Rain Pt.6
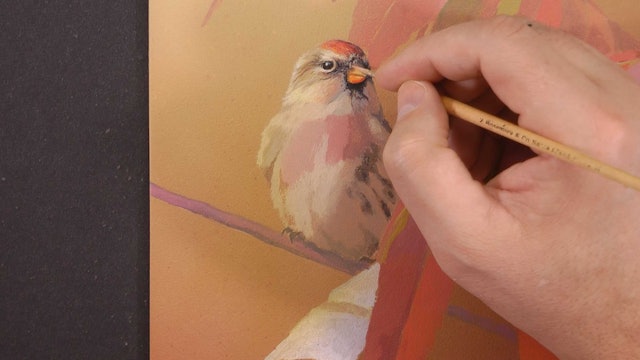
In this part of the tutorial we build up the body of the redpoll and then add lots of detail to the breast down.
-
After The Rain Pt.7
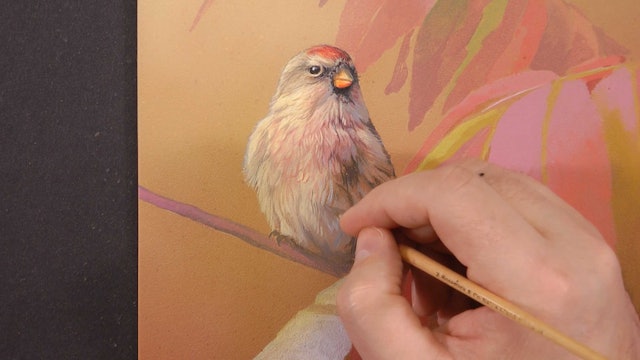
In this part we learn to blend base colours of the sumac and then break the shapes up with detail.
-
After The Rain Pt.8
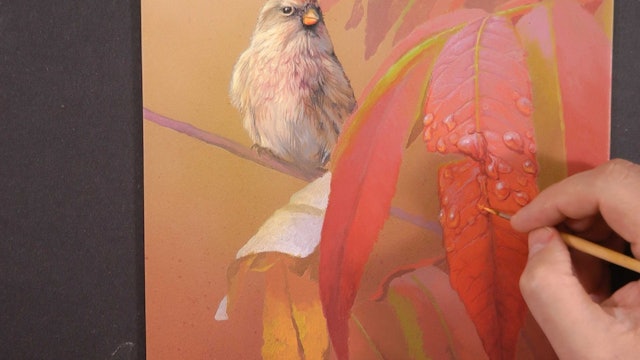
In part eight of the tutorial we learn how to add 'punch' with the addition of water droplets to the main leaf.
-
After The Rain Pt.9
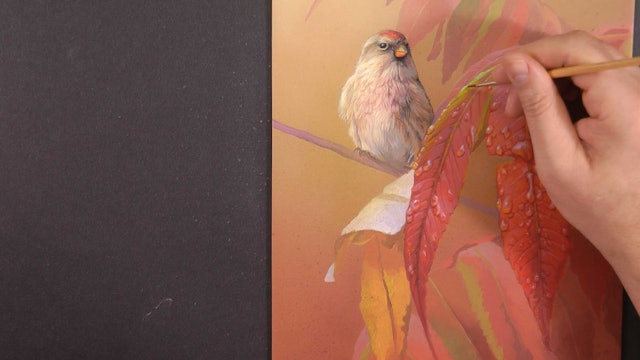
in this part we finish off the droplets in the main leaf and begin the build up of shape, form, detail and water droplets in secondary leaves.
-
After The Rain Pt.10
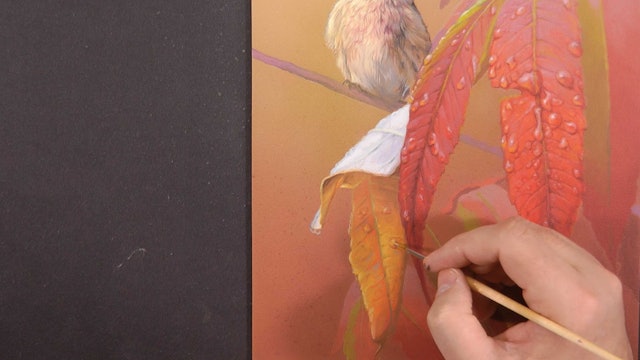
We now add a shot of yellow into the painting with the lower sumac leaf. First build blends and then breaking up with detail.
-
After The Rain Pt.11
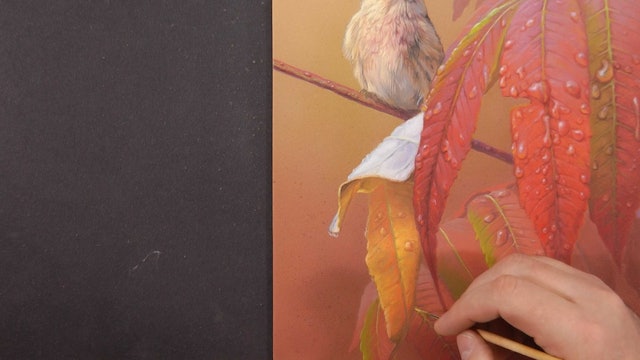
We start this part by painting the sumac stock the bird is resting on. As the chapter moves on we build up the right sumac leaf in the background.
-
After The Rain Pt.12
In this part we detail the sumac leaves in the background at the bottom of the painting.
-
After The Rain Pt.13
We continue to detail the bottom/background sumac leaves and then add the water droplets to them.
-
After The Rain Pt.14
Using the same 'reduced hue' techniques learned painting the bottom sumac we now paint the top background sumac leaves.
-
After The Rain Pt.15
In this final chapter we add water droplets to background leaves and to the perch stock. We add final detail and use masks to add extra speckling.
-
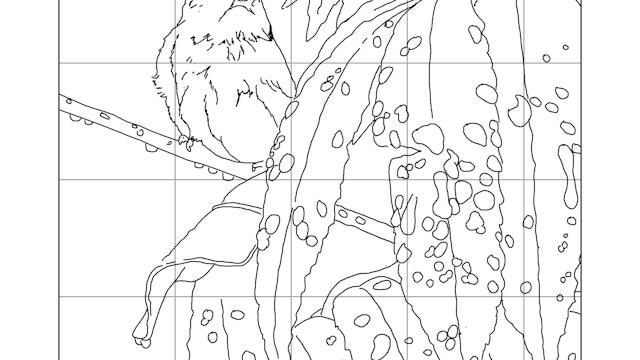
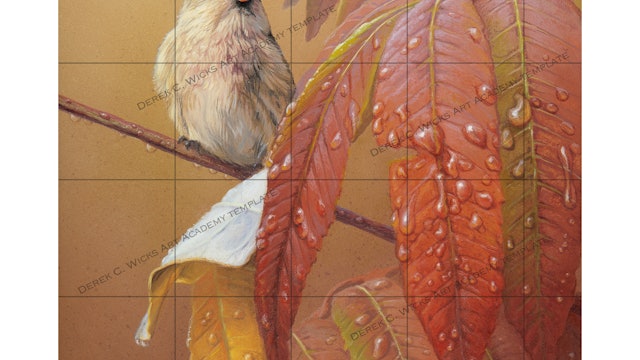
after-the-rain-line-drawing.jpg
892 KB
The line drawing to assist in transfer to board for this art instruction tutorial.
-
 1.56 MB
after-the-rain-template.jpg
1.56 MB
The colour template for reference and for transfer to art board.
-
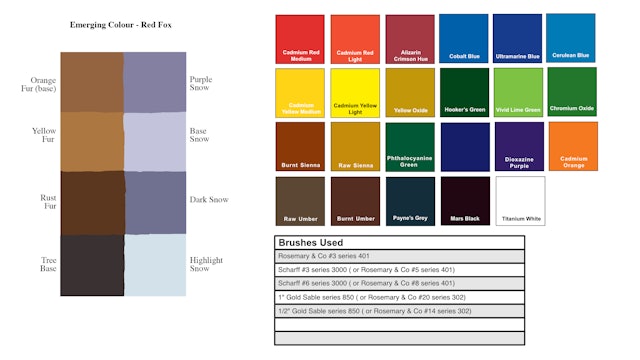 1.5 MB
after-the-rain-materials.jpg
1.5 MB
All colours, brushes, extra materials and colour swatch used in this tutorial.
-
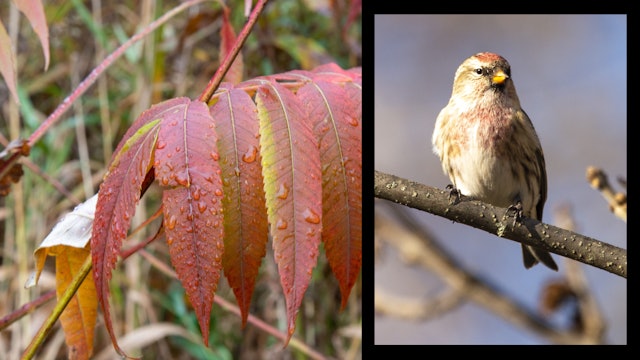 1.87 MB
after-rain-reference.jpg
1.87 MB
The photo reference that inspired the original painting.