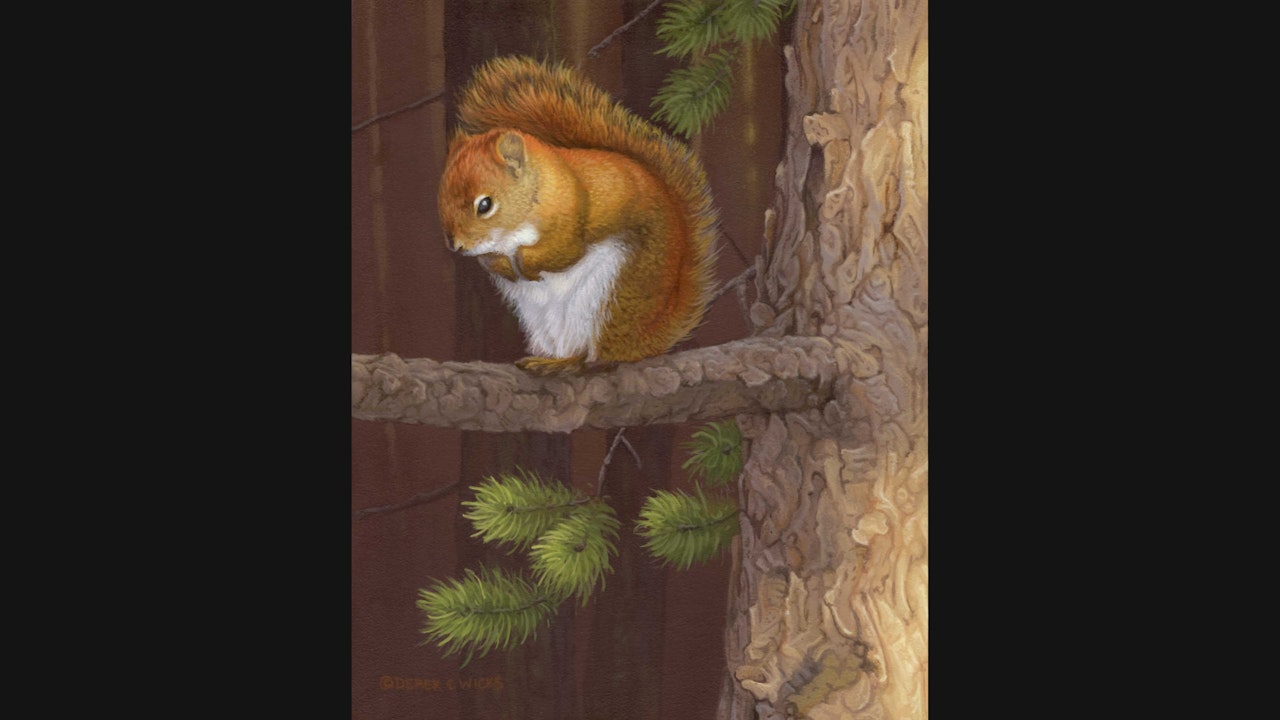
A Place In The Pines
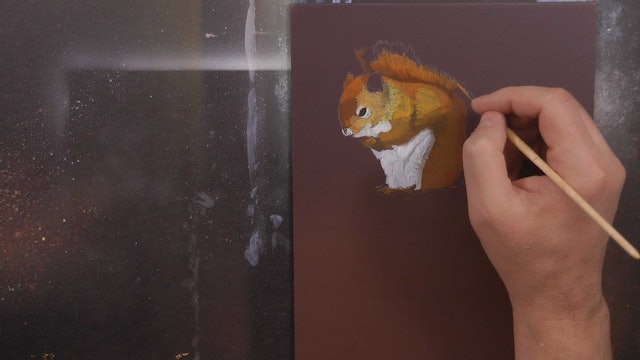
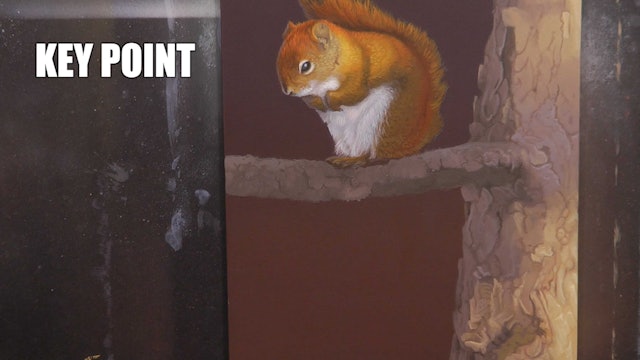
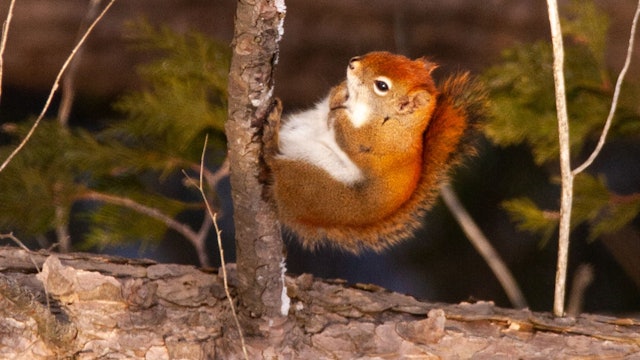
Buy This Tutorial Here - This painting was inspired by the resident Red Squirrel that patrols the forest behind my house. My dog Tuk and I are constantly scolded by this squirrel whenever we venture into the backyard and always from the same perch, so it seems. I loved the lighting and instantly wanted to paint the scene because of the dramatic mood lighting the reference provided.
In this cute, cuddly art tutorial we will learn how to paint short fur that is both drenched in sunlight and falls in shadow. We also learn how to break down complexed woods, like this eastern pine, and how to add detail to create texture. We will also learn how to paint a subtle background to add atmosphere and depth to our painting.
Run Time: 5Hr 23 Min
Difficulty: Intermediate
Board Size: 10 x 8 Inches
Lesson Aids: Line Drawing, Colour Template, Materials List, Reference Photo.
-
A Place In The Pines Pt.1
We start by mixing our base colours and then applying a gradated blend to our board. Once board is dry we block in our red squirrel.
-
A Place In The Pines Pt.2
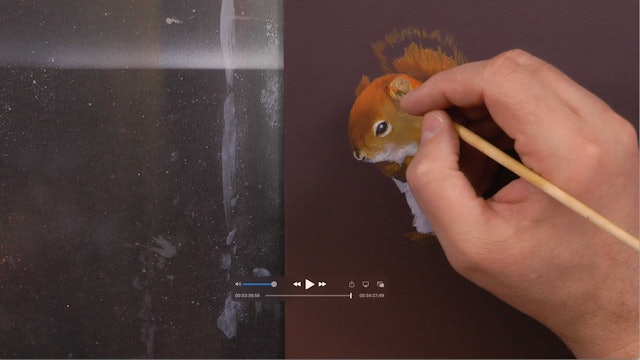
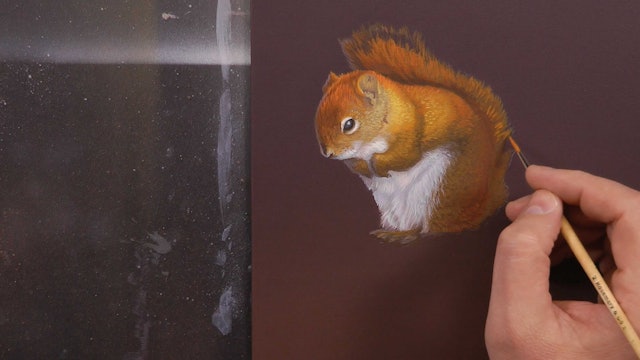
In part two we build up our shape and form in the squirrel, establishing good local colour, and learn how to use temperature to create shadow areas.
-
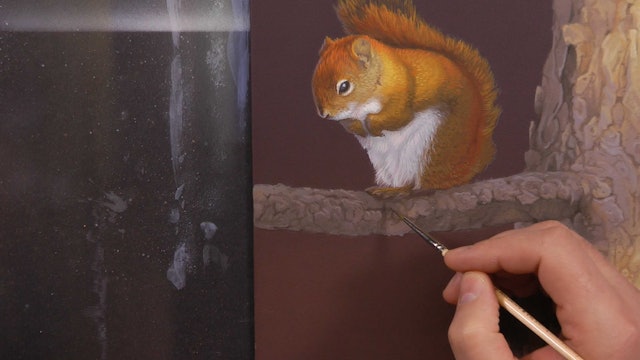
A Place In The Pines Pt.3
In part three we start to add detail to the squirrel. Here direction and value are very important techniques we learn.
-
A Place In The Pines Pt.4
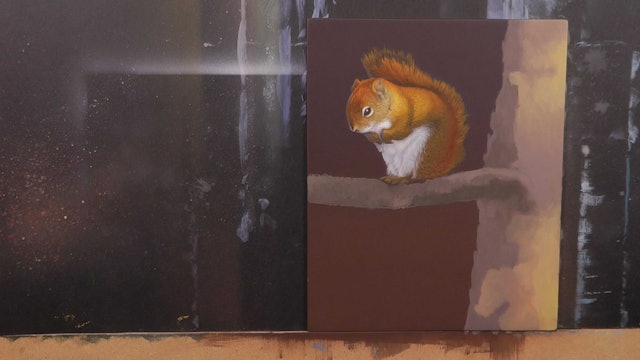
In part four we start to block in the eastern pine tree. Using wet on wet blends we prepare the area and establish the play of light and shadow.
-
A Place In The Pines Pt.5
In part five we break up the blended areas of the tree and start to create the elaborate cracking and bark textures of the tree.
-
A Place In The Pines Pt.6
With our initial break up of the trees bark done we concentrate of detailing the bark paying specific attention to the 'light modeling' of texture.
-
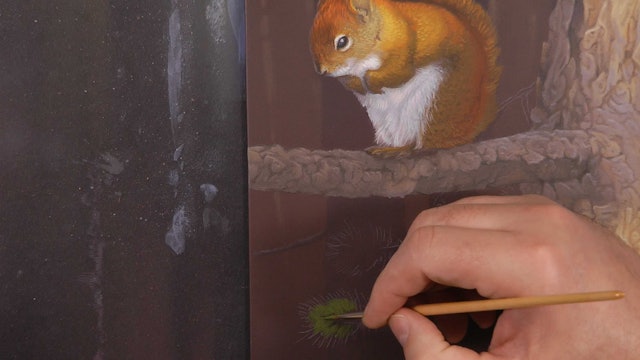
A Place In The Pines Pt.7
In this section we learn to 'reverse' our gradation and then block in the basic shape in the background. We then block in the pine needle sprays.
-
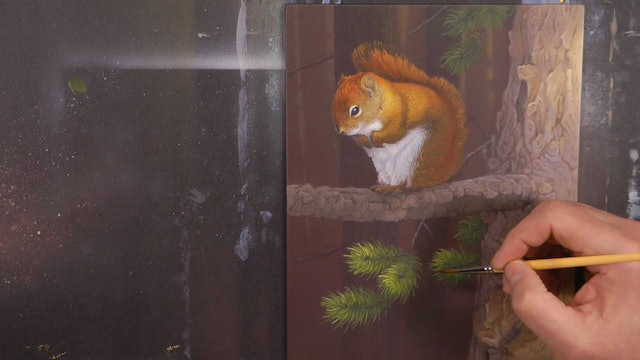
A Place In The Pines Pt.8
With the background prepared we add detail to the mid-field trees and soften through washes. We then move our attention to the sprays of needs.
-
A Place In The Pines Pt.9
In this final part we add our finishing detail and learn tips on Golden Ratio before applying final 'softening' where needed.
-
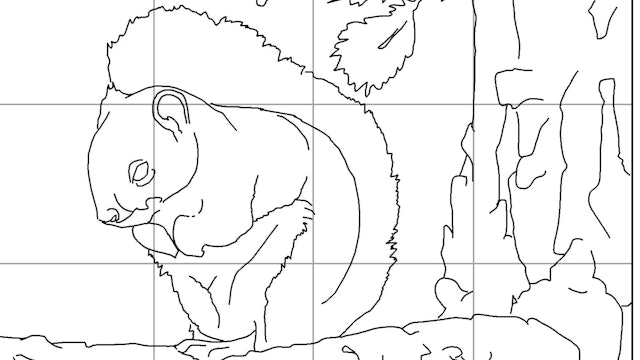
a-place-in-the-pines-line-drawing.jpg
532 KB
The line drawing to assist in transfer to board for this art instruction tutorial.
-
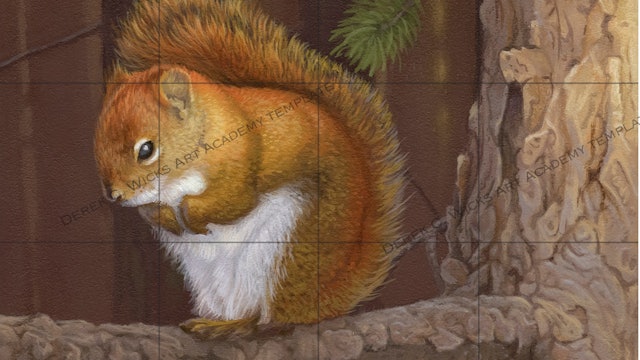
a-place-in-the-pines-template.jpg
1.92 MB
The colour template for reference and for transfer to art board.
-
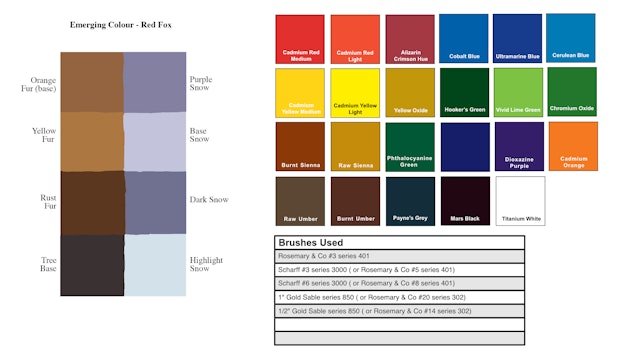
materials-list-place-in-the-pines.jpg
1.48 MB
All colours, brushes, extra materials and colour swatch used in this tutorial.
-
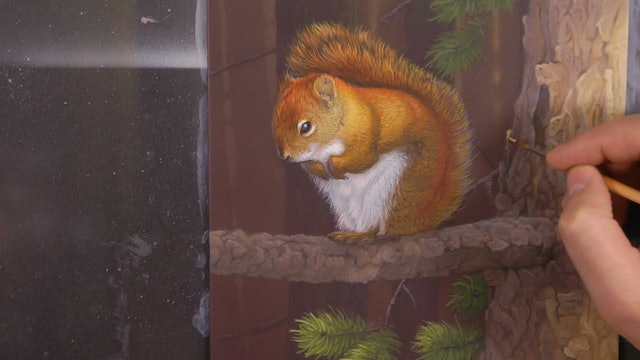
a-place-in-the-pines-reference.jpg
1.88 MB
The photo reference that inspired the original painting.